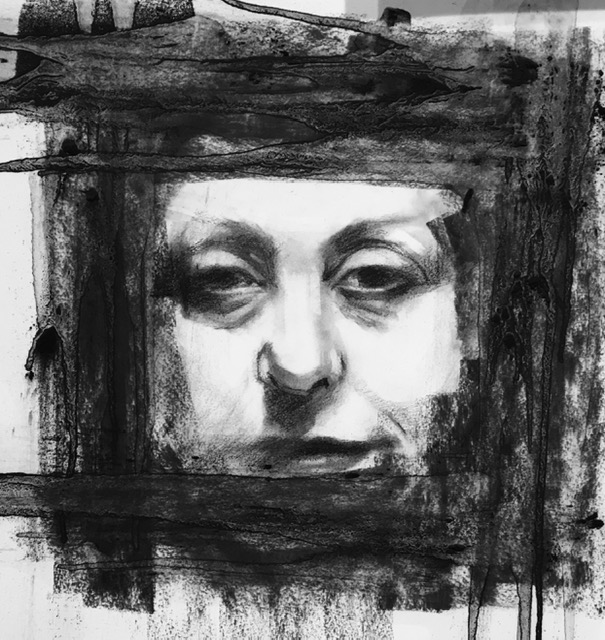
This month Tina demonstrated how to produce a ‘deconstructed’ portrait using charcoal on water colour paper. The paper she used was A2 Cass Art – a really white 200g paper and she also used charcoal powder (good tip – you can make your own homemade version by placing a stick of charcoal in a paper towel then stamping in it! – the dust can be collected and stored) and thick willow charcoal sticks. You will also need a couple of old paintbrushes that you are happy to use with the charcoal powder. It is important to note that this technique will produce an end result of a portrait that will finish up lying somewhere between abstract and reality.
Working big is a good idea when using charcoal. It will stop you from tightening up too soon and encourage lovely sweeping strokes. With this technique you need to start boldly. Taking her big size 18 Cotman brush, Tina dipped it into the charcoal powder. Then she put it straight onto the paper – the dust applied created two eye sockets and shadows under the nose and neck. Be loose about this process – if you make a mistake you can always lift the charcoal off.
It is important to state that, as with so many times in the past, you need a well-lit face for your photograph. However do try to avoid the ‘Hitler’ moustache under the nose if you can! The photo reference doesn’t need to be of great quality. The idea is to work from the poor printout first which gives you shapes and then follow through with the photo reference on the computer screen.
It is also worth noting that in order to capture a personality you do not need to draw a perfect likeness. Tina knows this model well and as she draws she is also interpreting the character of the model which is just as important as taking time to measure where the features sit. The process is really about challenging yourself and sometimes you need to feel challenged and out of your comfort zone to produce your best work.
As Tina applied the brush marks with charcoal powder we could see a face developing – your brain is already joining the dots and you could see that it only took a very few marks for a face to begin to take shape. Tina then added a little drama by placing marks for the cheekbones too. It was like watching a master at work.
Once the loose shapes had been placed on the paper it was time to use the willow charcoal stick. This was where the darker tones were introduced into the composition. When attempting to depict the eyes look at the whites of the eyes first, as if you get that shape right then it will help to get the iris the right size. Continue to blend with your brush. Don’t be tempted to use your finger as this might introduce grease onto the work.
Once you have finished with the darks then it is time to start lifting out the lights using a pencil eraser (not a putty rubber). Think about the anatomy of the face when doing this, e.g. observing the muscles around the eyes and appreciating that the ball of the eye comes out. You can now go back in with the charcoal and look again with the darks and check the tonal values.
Tina uses a mist Spray bottle with turps or Zest-it solvent to break up the charcoal. It gives a lovely textual finish to the portrait. Tina never uses fixative on her work as it lightens the tones or colours.
Members are encouraged to try the method and share their work on our private members Facebook Page and if you enjoy using charcoal then check out a couple of Instagram pages Zin Limart and Mad Charcoal both of which are followed by Tina.
Once again a sincere and heartfelt thank you to Tina for a professional and informative demonstration.
